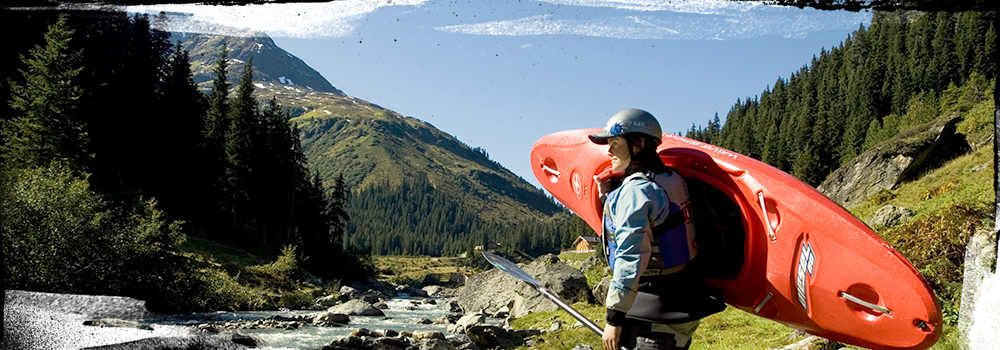
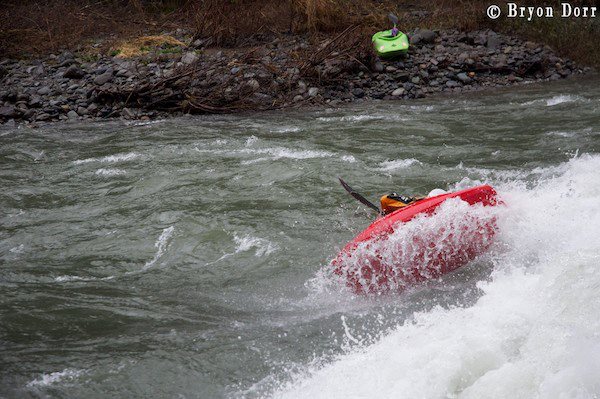
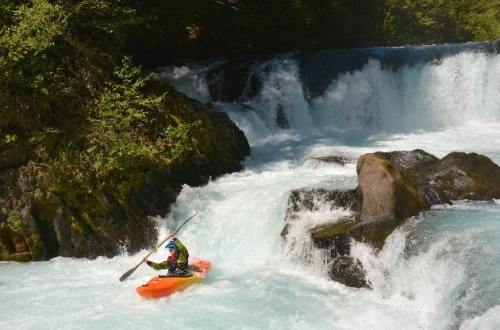
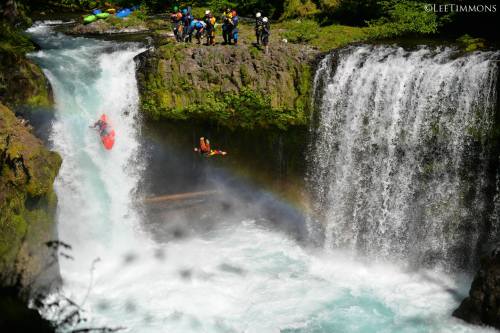
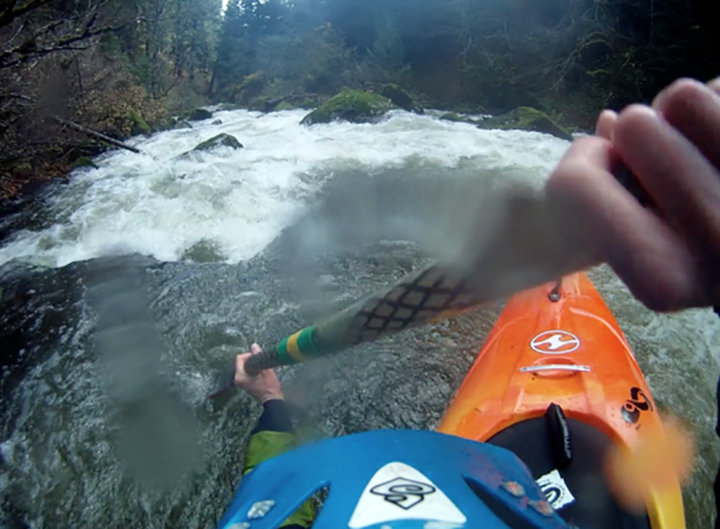
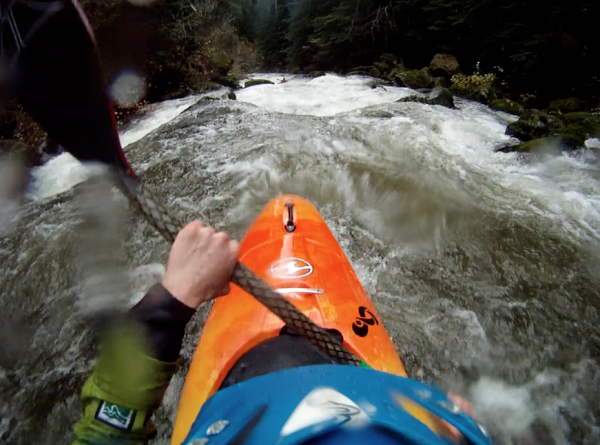
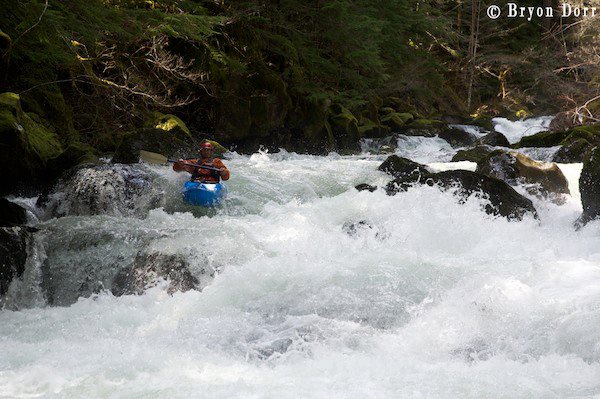
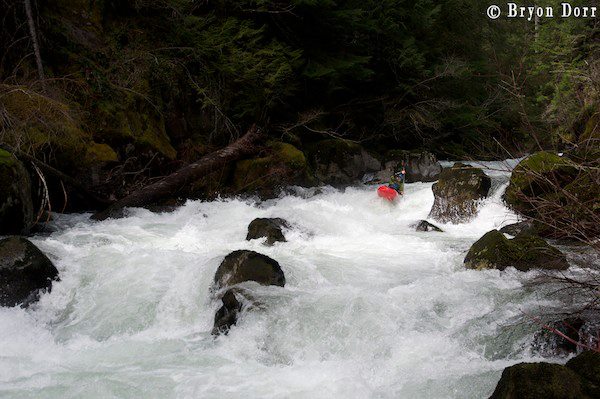
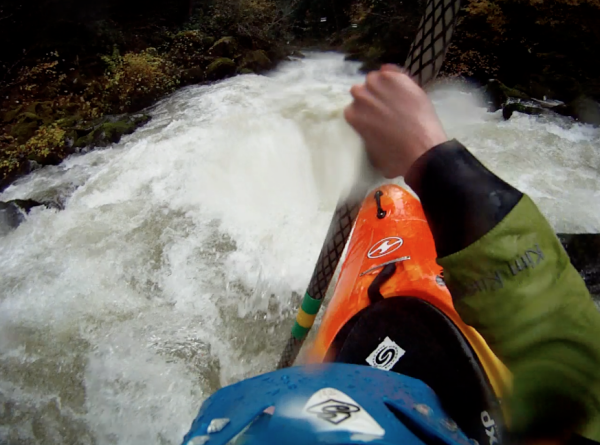
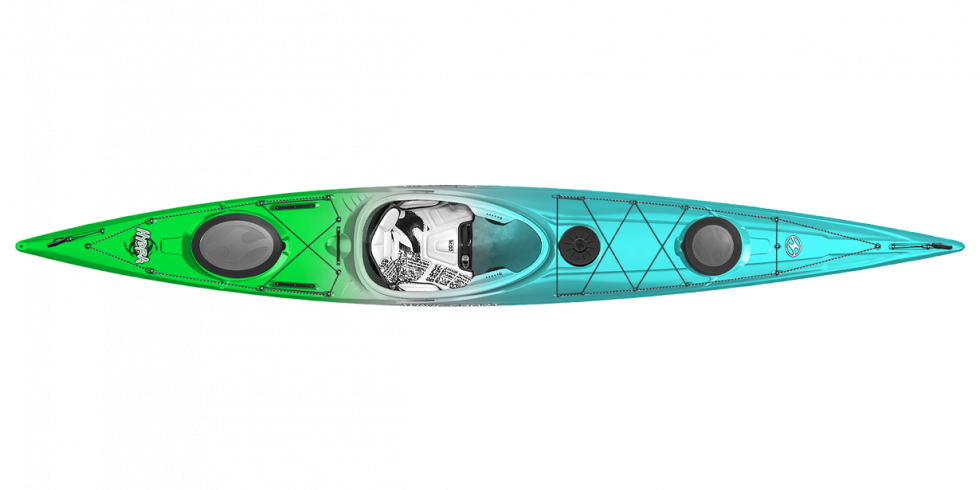
Skip to content
Kim Hardin's blog
header image
Blog
Menu

Layering for Winter Paddling

Posted: 23.12.2016 BY Kim Hardin

winter kayaking

As it starts to get cold in many parts of the country, we start to think about layering for winter paddling. Here's a few tips to help ease the transition into the cold and snow.

"What did I wear last winter?" 

"Should I add an extra layer?"

"Thick wool socks or normal socks?"

1. No cotton! Cotton absorbs water and holds it close to your skin. Brrrr!

2. Layers: When you're layering, start off with a wicking layer closest to the skin (merino/synthetic), followed by an insulating layer (fleece), and finally a waterproof layer (dry top/drysuit). Feel free to add more than one insulating layer if it's really cold. I use the Kokatat Power Dry Liner, a fleece onsie. 

**Try to find the balance between wearing too much (sweating out and getting cold), and not wearing enough (Starting cold and staying cold).**

3. Head cozy. As soon as your head gets cold, you start to shut down. Even if you choose not to wear it, keeping one in the front zip of your PFD can save you on a really cold day. Check out Kokatat's Surf Skin Skull cap.


4. Pack a thermos of tea or hot cocoa for a quick riverside warmup or a go-to handwarmer.

5. Extra layer, fleece gloves and hat: No matter whether I'm play boating or creeking, I always toss in a dry bag with an extra layer, some fleece gloves and a fleece hat. You never know when you want to hang out at a play spot for awhile, or you're faced with an extended portage. Always be prepared -- especially in winter!

6. Drysuit: Some people prefer a wetsuit, while others prefer a drysuit. I highly recommend investing in a drysuit, as it keeps you significantly drier (and warmer!), than a wetsuit. A wetsuit, while cheaper, does somewhat absorb the water, and allows under layers to get wet. Not to mention, it's as easy as wearing your PJ's under your drysuit sometimes (NO COTTON!). If you're looking for the most bang for your buck, check out Kokatat's Idol drysuit. It zips at the waist and the top can be worn solo as a dry top. 2 in 1! 


Note: A drysuit w/ goretex booties let's you keep your feet fully dry and warm -- key to surviving the winter weather!


Stay warm out there!

Kim Hardin 


header image
Blog
Menu

The 6 Wonders of the Project X

Posted: 06.02.2017 BY Kim Hardin

kayaker on rapids

In case you haven't heard, the Project X has returned!


To celebrate, I figured I'd re-enlighten the world as to the 6 Wonders of the Project X. While I love my Mobius for big air, there's something about the Project X that gets me excited knowing it's back on the market!


1. Easy to paddle: Volume has been moved closer to the body than prior Project versions, making it easier to paddle. Good primary as well as secondary stability. Just enough length to paddle well downriver. Three inches longer than the Mobius,  the Project X is a little less of a "spud" boat, so to speak, offering greater stability downriver. 

2. Outfitting: Blackout or Whiteout, tried and true. Comfortable, performance-based outfitting. It stays in place, even through the biggest moves, and let's you become one with your boat.

3. Stability: Easy to Well balanced end to end-- never feels like it is going to topple over

4. Slicey bow: As a smaller paddler, allows me to initiate a cartwheel easier than the Mobius, and stay more in control through consecutive ends. For me, the Project never feels like it wants to topple over, in comparison to the Mobius. With that said, the Mobius cartwheels well, I just need to put a little more work into my technique and really look where I want to go -- It's slightly less forgiving.

5. Speed: On a Wave: In my opinion, more speed than the Mobius. Aggressive edges designed to allow for a quick, explosive release from the water for those big air moves. Easy transitions from edge to edge. Lack of bow-pearling.

6. Cartwheeling: In a hole: In my opinion, in a hole the Mobius excels over the Project, however, as a smaller paddler, I do feel as though I am able to initiate ends better in the Project, due to the slicier bow, and less volume. Not to mention a little more stability when linking cartwheels due to the extra 3" of length.


With the return of the Project X, you may feel a little overwhelmed with choices when looking to purchase a playboat.

On the WaveSport side of things, you can't go wrong with either the Project X or Mobius. If I had to give my two cents, after paddling the original Project, the Project X and the Mobius, I would say the Project X is somewhat more forgiving than the Mobius, mostly due to edge design, planing surface and length.

If you're already cartwheeling and looping up a storm, go for the Mobius to take your paddling to the next level! If you've started to learn the double pump, and looking for a playboat that will not only help you learn tricks, but excel and be awesome through your progression, go with the Project X. When in doubt, try them out!


Happy Paddling,

Kim Hardin


header image
Blog
Menu

Paddling vs. Mountain Biking

Posted: 23.12.2016 BY Kim Hardin

With the re-discovery of climate change, it seems as though 88.3% of paddlers are turning to mountain biking in the summer as we wait for the winter rains and the start of the creeking season, myself included!

While 7 days off the water makes one weak (haha), a little time off of the water and on the bike is good for cross training:

1. Interchangeable lingo: Boof, stomp, eddy out, S-turn. You can keep your whitewater lingo strong by using them for more or less the same purpose while mountain biking! "Dude, that boof was huge!" "I'm going to boof that rock, and eddy out at the bottom".

2. Line choice: Line choice is key! Generally speaking, you either nail it or fail.... Think mountain biking through technical boulder gardens, and down steep downhills. How do you get to the bottom as smoothly as you can, without crashing? Crashing on a mountain bike generally hurts a little more, and is even more incentive to keep your head up and look down the trail (think river!), to sight your line. Keeping the "mental" side of paddling fresh is just as important as the physical!

3. Clothing Choice: Practice your layering! You don't want to sweat out by the top of the climb or mid-way through a river section in the middle of winter.

4. Cardio and grip strength: Biking will get you in prime shape for the creeking season. Especially your core!

5. FEAR: Believe it or not, mountain biking can help you face your fears. Fear of speed, crashing, horrible lines, etc... practice sighting your lines, looking where you want to go, and following with your body. Drive the bike, don't let it drive you. All things we should be doing while paddling!

Following the rain in the winter, and loamy trails in the summer, my life is a balancing act between professional paddling and professional mountain biking. I've traveled to Italy, Chile, Argentina and more racing the Enduro World Series during the summer, and am excited to be home for a bit to enjoy the off season and get re-acquainted with my Wave Sport Recon. 


For now, I'll leave you with a fun video to get you amped on the upcoming creeping season:


Cheers,

Kim Hardin


header image
Blog
Menu

How To Boat Scout

Posted: 31.07.2016 BY Kim Hardin

Have you ever found yourself on a river, walled in above a gorge, unable to get out of your boat, but needing to scout? If you know the basics of boat scouting, you CAN scout the rapid, and pick your way through the gorge below.

First things first, look ahead. As you are approaching the next rapid, sit up as tall as you can in your kayak, and just as you do from shore, scout the rapid. Can you see if you are dropping into a gorge, or is the rapid wide open? Is there a pool below, or is it a long continuous rapid? Are there waves? Holes? Crashing curlers? Are there any eddies visible in the rapid? How about hazards – rocks, trees, etc.?

Two paddlers boat scouting Blossom Bar on the Rogue River, Oregon

If you see a line, commit to it, and charge your line. Be confident in your skills and ability, and paddle hard. If you don’t immediately see a line, make a game plan.

Game Plan: Look for an eddy at the lip of the rapid from which you can sit for a moment and get a good look at the rapid. Use your scouting techniques learned on land from the eddy. Remember to be aware of your surroundings, and choose your eddy wisely:

1. Try not to choose the very LAST eddy above a rapid. This could result in a scary ferry above an obstacle, or actually commit you to a line you would rather not run.
2. If possible, choose an eddy from which you can paddle back upstream from, giving you other options as a back-up plan.
3. If the river bends to the right, try to chose an eddy on the left in order to better see down the rapid and around the corner (if you were to chose a river right eddy, you’d be trying to look around the corner, only make scouting more difficult).

If there is no eddy, try back-paddling at the top of the rapid while facing downstream. Sometimes, this can give you just enough time to survey the rapid, and successfully find a line. Again, be aware of your boat positioning, and the speed of the water, as it’s very easy to accidentally float into the rapid.

Once you see a line, take a deep breath, visualize your line, and commit to it. Peel out of the eddy, look where you want to go, and charge your line! Don’t forget to smile and have FUN!

Tips: Depending on the character of the rapid, you may only be able to scout the rapid from the top (waterfall), however, others you may be able to scout from eddies multiple times throughout the rapid (boulders gardens). In such boulder gardens, it is sometimes possible to scout just to the next eddy. This is an advanced boat scouting technique, and only recommend if you are comfortable in your abilities.


**Please note that every paddler is responsible for their own decisions, and their own paddle strokes. Each rapid is different, and not all suggestions from this post will work for every rapid. This is an informative post meant to give a general description on how to boat scout. Please make your boat scouting decisions wisely.**

-- 

Kim Hardin


header image
Blog
Menu

2015 Little White Salmon Race

Posted: 26.05.2015 BY Kim Hardin

The Little White holds some of the most pristine class V whitewater in the Northwest, possibly the entire West Coast, its rapids known worldwide: Gettin' Busy, Boulder Sluice, Island, Sacriledge, Double Drop, Enchanted Forest, S-Turn, Backender, Bowies, Wishbone, Horseshoe, Stovepipe, Spirit.

(Photo: Lee Timmons: https://www.facebook.com/leetimmonsphotography)


Racer's Safety Meeting  (Photo: Lane Jacobs)

Each year, World Class Kayak Academy puts on a race from Gettin' Busy to Wishbone, sending paddlers through over a dozen class V rapids solo or in teams of 2 or 3. This year, water levels were low, very low. So low, in fact that World Class moved the race up about a month, and even then there were questions if the race was a "Go". Despite these low levels, on race day, about 35 world-class racers showed up to put their paddling ability to the test, and navigate the waters of the Little White. While I had raced the Little White as a team two years previous, it was a goal of mine to race solo.

Yours Truly (Photo: Mountain Mind Collective)

To be completely honest, this goes against all that has been ingrained in me as a paddler. Never paddle solo on class V. There is safety in numbers, so to speak, or at least more resources on the water, if needed. It took a little bit of mental convincing, but come race day, it was on! I chose the Recon 70 as my boat of choice for its ability to hold a line, resurface quickly, and boof big.

Nicole Mansfield and Ali Z. cruising into Boulder Sluice (Photo: Cheyenne Rogers)

Racers started in the eddy below the Oregon Slot, at the start of Getting' Busy. Fifteen minutes later, we arrived in the eddy below Wishbone, hustling across the pool to an imaginary line. Of all the racers, there were NO swims, or carnage at all for that matter. Special thanks to World Class for putting together a rad event, and Discovery Bikes for hosting the after-party!

Cruising through S-Turn (Photo: Catherine Loke)

Ethan Smith & Dane Jackson: They've got Spirit! (Photo: Lee Timmons)

Gerd Serrasoles came out on top with a  time of 16:07, followed by Rush Sturges (16:21) and Dane Jackson (16.25). On the ladies front, I was the only solo racer, winning the day with a time of 19:37, while Ali Z & Nicole Mansfield rounded out the women's division in the team category and a time of 20:05. YEA LADIES!

Can't wait for next year!


header image
Blog
Menu

Upper Trout Creek, WA

Posted: 27.10.2014 BY Kim Hardin

We are lucky as paddlers to live in the Columbia River Gorge. During the rainy season, within a half hour drive it is possible to be at over a dozen different rivers. Each and every one, unique, and awe-inspiring.

One of my favorite rivers in the gorge is actually a creek – Trout Creek, a tributary to the Wind River, located near Carson, WA.

A 194 fpm, class V classic, Trout creek is full of 2.5 miles of steep, continuous, technical, Class V boulder gardens, and is challenge to catch with water. It requires a few days of heavy rain or snowmelt, however, with a put-in elevation near snow-line, many times the road is covered in snow when there is water in the creek. It’s a bit of a guessing game whether or not there is snow on the road, but worth it if you can make it to the creek.

The take-out: The gauge rock can be seen bottom right (Photo: Bryon Dorr)

In general, Trout Creek can be run anywhere from 150-600 cfs, and takes between 25 minutes and 2 hours to paddle, depending on the group. The visual gauge is a boulder with a “cup” in it located just upstream of the take-out bridge. The creek can be run as low as 10″ below the cup or as high as water flowing into the cup. Today we were pleasantly surprised with water levels 2-3" below the cup, a perfect medium flow.

Cruising boulder gardens (Photo: Bryon Dorr)

Trout creek starts and finishes with some class IV boogie water, with the steepest of rapids in the middle mile. Wood is a known hazard on this run, so as always, be cautious of new wood on such a run, as the creek bed is ever changing.

Entering one of the first rapids of the day 

Joe Stumpfel in the middle of it (Photo: Bryon Dorr)

One of the larger rapids near the bottom of Upper Trout (Photo: Bryon Dorr)

If you decide to check out this creek, as around for local beta re: wood, hazards, snow/water levels and road conditions. Be prepared for some full-on, quality rapids, and remember to bring your pin kit!

Thanks Bryon Dorr of Exploring Elements for the photos! Bryon Dorr captures travel through an adventure sports lens and can be found on the road exploring the elements. For more information, please visit his website.

To get to the take-out: Head to Stabler, WA, and make a left on Hemlock Rd. Continue another 3/4 mile or so and take a right on FR 43. Continure on FR 43 until you reach a pullout where the Pacific Crest Trail crosses Trout Creek on your left.

To get to the put-in: FR 43 follows the entire run. The standard put-in is at the bridge about 4 miles up FR 43 where the road crosses Trout Creek. This put-in allows for a mile or so of class II/III for a warmup. As an alternative, it is possible to pull over at the first major pull out on the left side of the FR 43, and hike through the woods to the creek. This will put you on the river right as rapids start to steepen up. If you’re not sure where exactly you want to put-in, drive up toward the bridge on FR 43 as far as the snow allows, and put-in.


header image
Blog
Menu

First Impressions: The Mobius

Posted: 05.07.2014 BY Kim Hardin

Being July in the Northwest, we're a tad short on water and play, but we're still high on stoke (did I really just say that?)!

My shoulder rehab has been a long process, but I'm officially back in my boat, and able to do the important things like boof, cartwheel, and wave wheel! YES!

Bow Stallin' at the Hood River Marina 

My first impression of the Mobius 49: CUTE, and FUN!

The Mobius feels similar to the Project X in fit, however, is about a half inch wider, meaning greater stability, and a loose huller. While I've yet to get it on a wave, it is easier to initiate the bow for cartwheels and bow stalls than the Project X. The Mobius is super easy to throw around, even with the added volume at the knees, and seems as though it will be pretty fast on a wave. In fact, designer Hans Nutz designed the stern of the Mobius to actually help it to catch waves. 

Outfitting the Mobius's is a breeze with Wave Sport's WhiteOut Outfitting system and with the new track system in place for easy fore-aft movement of the seat. Loosen the bolt at each hip near the cockpit rim, loosen the yellow knob, push down and slide the seat forward and back...EASY!

For a tighter fit, particularly for us smaller folk, tighten the ratchet under your thighs a few clicks, bringing your legs up into the thigh braces proper.

For more tips on outfitting, check out my post, "How to outfit your new creek boat". While the post outlines my suggestions as well as approaches to outfitting a new creek boat, they are also applicable to a play boat as well as river runner.

See you on the river,


Subscribe to RSS - Kim Hardin's blog